Introduction
This document contains instructions to configure a Commotion wireless node through the Commotion Setup Wizard and the administration interface. This is a vital part of deploying and adding nodes to a Commotion-based community wireless network, ensuring that new nodes are compatible with the network. If you have not installed Commotion on the router yet, see the installation documents in Guides and How-tos before using this guide. This document includes:
- Gathering the information you need to configure your node
- Running the Commotion Setup Wizard
- Accessing the Commotion administration interface
- Setting basic configuration options in the Commotion administration interface
- Advanced Commotion configuration settings
- A worksheet to help you record important information about your nodes and network and a “hands-on test” to become more familiar with important configuration settings
Configuring Routers should take 30 minutes or less.
Materials + Supplies Needed
- A router with Commotion installed, plugged in to your computer’s Ethernet port.
- A copy of the worksheet at the end of this document, to keep track of settings.
- (Optional) A printed or off-line copy of the node hands-on test located at the end of this document.
Get Ready to Run Commotion Setup Wizard
If the new node will join an existing network, first gather that network’s settings before you run the Commotion Setup Wizard on the router. You will need at least the mesh network name, wireless channel and the mesh encrytion password, if the mesh is encrypted. Then begin with the first section: Existing Network.
If you are starting a new network, you need to make a few decisions with your community before you run the Commotion Setup Wizard, so skip down to New Network.
Existing Network
Talk to a network organizer to get the following information:
1. Mesh Network Name (SSID), WiFi Channel, and Mesh Encryption Password (if used).
2. Access Point settings:
- Do the Access Points use a password?
- If so, does each node use its own password, or is there a shared password among all the nodes?
- Is there a system for generating/sharing passwords?
3. Node naming system—does the network have a way to name nodes, or can you name it anything you want?
4. Administration password—is this shared across the network, or can you set your own password? Skip to Run Commotion Setup Wizard.
New Network
First, you need to decide basic network information. Decide with your community:
- How will you name the network and your nodes?
- How will you name your Access Points? Will they be secure or open?
- How will you create and store passwords (admin, mesh link, and maybe AP)?
Move on to Run Commotion Setup Wizard after you decide how passwords will be set, and how nodes will be named.
Run Commotion Setup Wizard
The Commotion Setup Wizard walks you through the basic steps to configure your router as a mesh node.
Before you start, you will need to connect your computer’s Ethernet connection to a newly flashed node. The node will give your computer a DHCP lease. It's a good idea to turn off your computer's wireless too. Then browse to the URL http://thisnode in your browser.
Make sure you record all the information you enter during the Commotion Setup Wizard:
- Node name
- Admininstration password
- Mesh Encryption Password
- Access Point password (if you set one).
Don’t share the passwords or information with anyone, unless you trust them on the network!
1. Start Commotion Setup Wizard by clicking on the image labeled Setup Wizard:
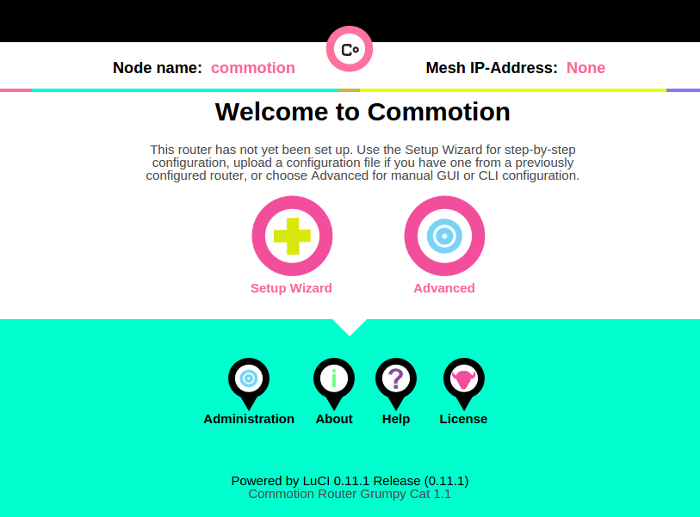
Clicking the Advanced button will disable the Commotion Setup Wizard and allow you to configure your node manually.
2. Use the information you gathered or decided on to fill in the fields in the Commotion Setup Wizard. The Setup Wizard has four required pages and one optional page. The values you enter are saved as you navigate between pages, and are applied on the Configuration Confirmation page.
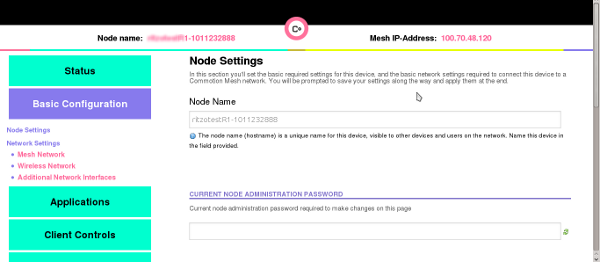
Setup Wizard, page 1 - Node settings
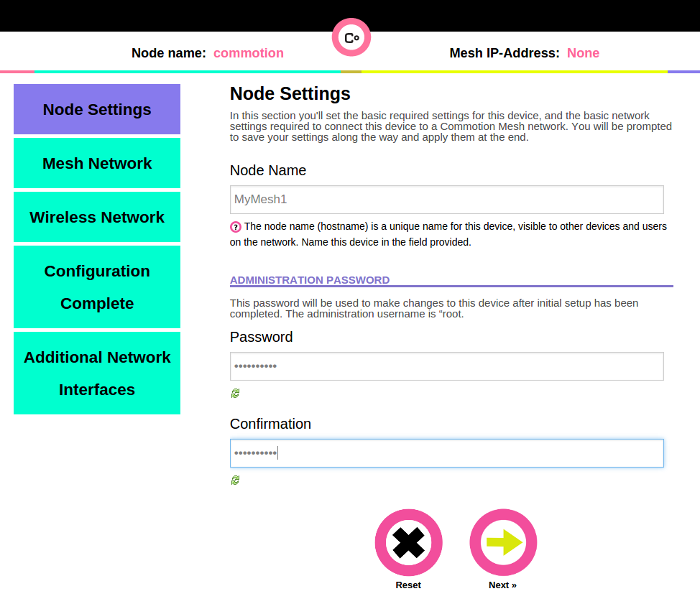
Enter the Node Name and Administration Password.
Setup Wizard, page 2 - Network settings
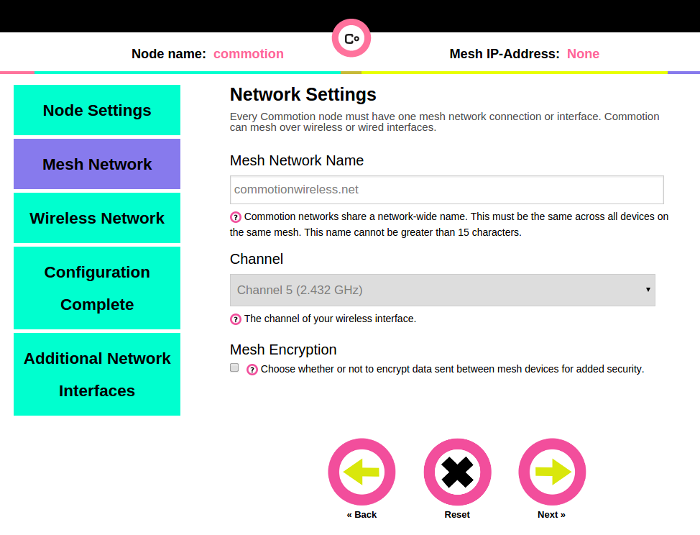
Enter the Mesh Network Name and select the Channel. If your mesh network should encrypt traffic between mesh devices, check the appropriate box and enter the Mesh Encryption Password.
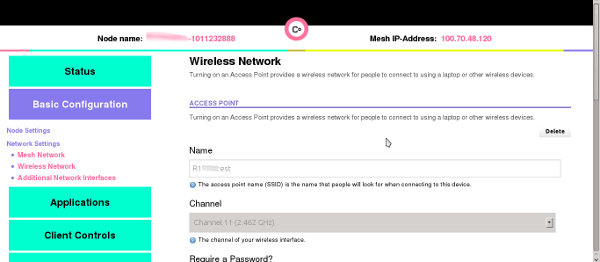
Setup Wizard, page 3 - Wireless Network
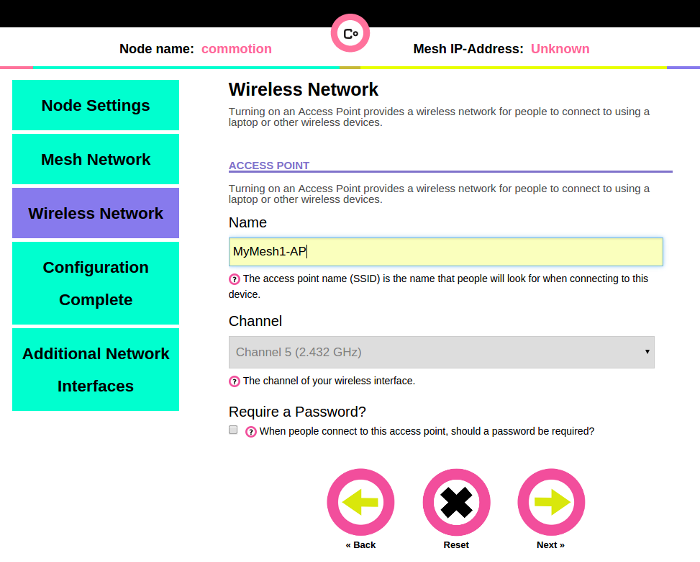
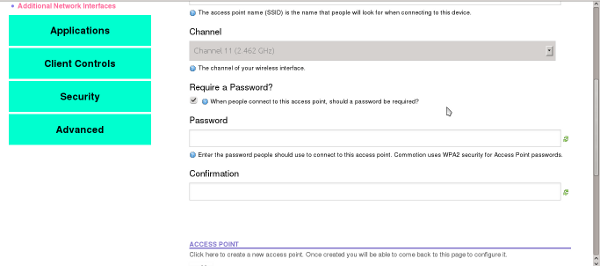
If desired, configure an Access Point (AP) to provide wireless network access through this node. Enter the Access Point Name and provide a Password that people should be required to use to connect.
Note: If you configure an AP on the node, it must use the same channel as the Mesh network.
Setup Wizard, page 4 - Configuration complete
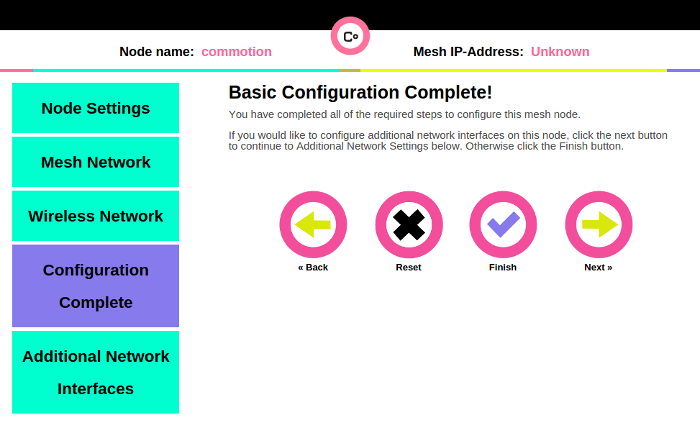
You have now completed all the required steps to configure your mesh node.
- If you are done, click Finish to review and apply your settings.
- If you want to start over, click Reset.
Optionally, if you want to set additional options for how the wired WAN (Ethernet) port behaves, see Advanced Configuration options below.
Setup Wizard - Confirm settings
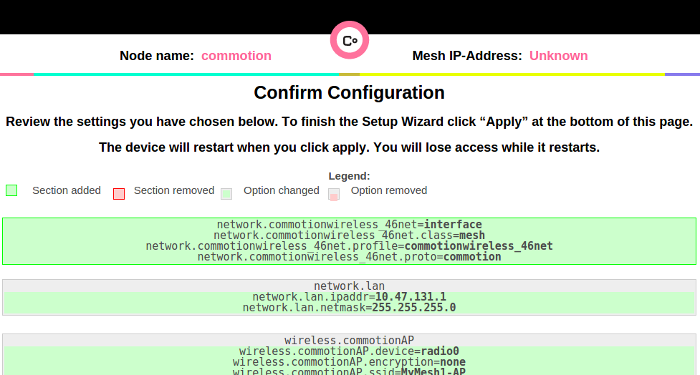
Skim through the settings, then scroll down and hit Save and Apply:
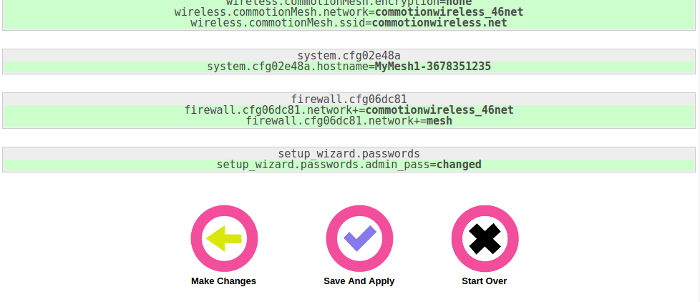
3. When you finish the Commotion Setup Wizard, the node will reset. This will take a couple minutes—be patient. When the node starts up again, it will automatically connect to other mesh nodes in the area with matching mesh link information.
</section>
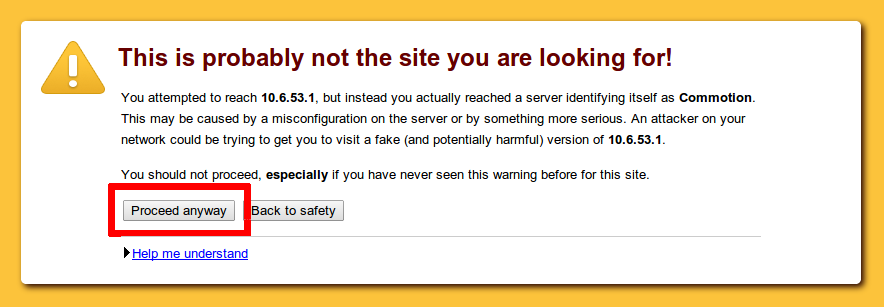
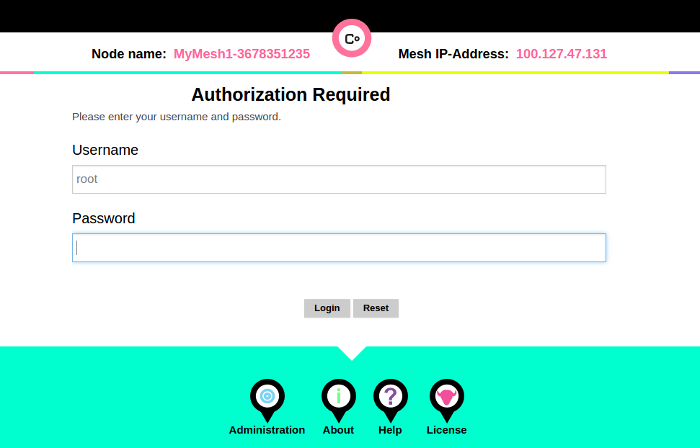
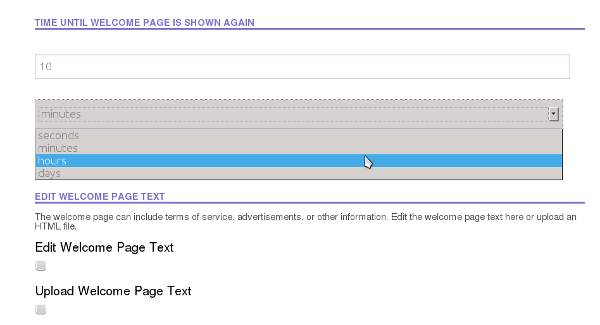
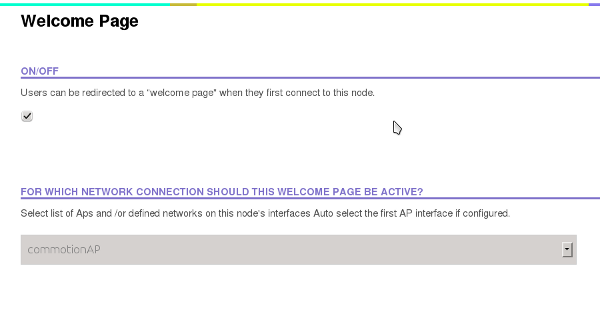
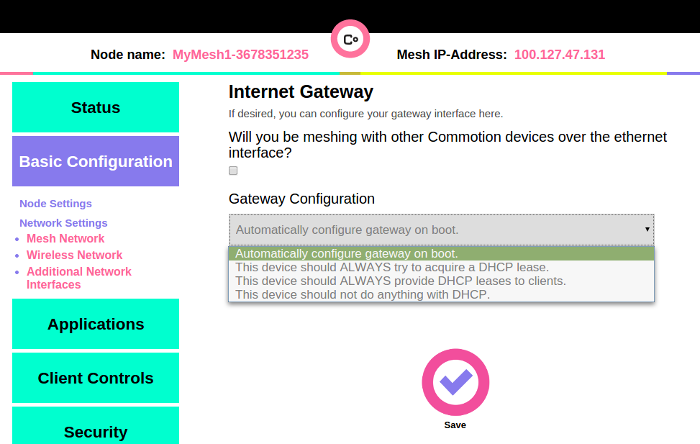
Now, log in to the Administrator configuration pages. After the Commotion Setup Wizard, your browser should take you to the admin page automatically. If it does not, type thisnode/ into your browser’s URL bar and press “Enter”. Now click on the Administration button at the bottom of the page. You will now be making a secure connection to your node (note the "https" in the address bar of your browser -- the "s" stands for secure). You will encounter a certificate warning here because the node's certificate that is used to create the secure connection was not signed by a "certificate authority" and so the browser cannot verify the node's identity. You should be cautious when you see these warnings because they often mean that your secure connection to a website may be insecure, but in this case it simply means the node's certificate was self-signed. You will be prompted for a username and password. The administration username is always "root" - enter it if necessary. You set the administrator password during the Commotion Setup Wizard, enter it and hit the "Login" button. The basic settings for your node were set during the Commotion Setup Wizard, but you might want to know how to change settings. Commotion's administrative pages have two displays: Basic Config and Advanced. Toggle between Basic and Advanced modes using the bottom button of the blue menu. Changing the most common settings will be in Basic Config and some settings will be changed in the Advanced menus. Below is a list of commonly changed settings and how to change them. Click below or scroll down. This password is for the “root” administrator on the system, and is required to access the Administration interface and to change any other settings. You set this during the Setup Wizard. This changes the system identification of the node on the network, not the Access Point name. Make sure that you don’t re-use or duplicate hostnames, it will cause problems! You can change the mesh link settings at any time. You might do this to create a separate network, to change the name of the mesh connection, or to change the mesh encryption key. If you are changing mesh link settings, this will break existing mesh connections. Remember that all settings (mesh name, Wi-Fi channel, and encryption password) must match for nodes to mesh! There are three common settings for the Access Point (AP) on a Commotion node: whether the Access Point is on or off, the name of the AP (SSID), and the security (whether the AP is password-protected, and if so, the password). Be sure to record these settings, in case you need them later. You can change most Access Point settings in the Basic Config menus: Navigate to Basic Config -> Network Settings -> Wireless Network for Basic Menu settings. Additionally in the Advanced menus you can: Navigate to Advanced -> Network -> WiFi for Advanced menu settings. To change the Access Point name: To turn on a password for the AP: To turn off a password for the AP: To delete an Access Point: To add a new Access Point: To turn an Access Point on or off: This may cause the node to become unstable. Rebooting the device after changing this function should help to prevent problems. When users connect to the Access Point, they can be directed to a Welcome Page (also called splash page or captive portal). You can turn this on or off, customize the text on this screen, and set the number of hours before a user has to re-accept the Welcome Page terms. If there is no Gateway (ie no Internet, just a local intranet) on the network, there will be no Welcome page. First, navigate to Basic Config -> Client Controls -> Welcome Page To change the text displayed on the Welcome page: You may also click "Upload" to upload an HTML file from your computer to use for the Welcome Page text. To change the time before a user must re-connect via the Welcome Page: To turn the Welcome Page on or off: If you are hosting a Gateway node (sharing Internet with the rest of the network), you can limit the total amount of bandwidth allowed for the rest of the network, using Quality of Service (QoS). It is important to note down the mesh IP address for your node. You can see if the node has successfully connected to other mesh nodes by viewing the mesh visualizer. Navigate to the Status page and click on Nearby Mesh Devices. If you would like to share bandwidth with the network, you can make your node a Gateway. You may want to finish other setup before completing these steps, such as Quality of Service, above. Occasionally there are new releases of the Commotion Wireless software, available on the Downloads page. Please download the "sysupgrade" version and follow these directions. Read the Verifying Signatures page for more information on making sure you have real Commotion images. Be sure to record your node and network settings so that you can re-enter them when you run Setup Wizard on the new version of Commotion. In the Basic Configuration menu, under Network Settings -> Additional Network Interfaces, there are additional options to configure how the WAN interface (the Ethernet port that is normally plugged into a router or switch with a connection to the Internet) behaves. On many devices, such as dedicated Access Points or client devices such as the Ubiquiti PicoStation or NanoStation series, there may be only one Ethernet port. On devices with multiple switch ports, this will configure the WAN port only. After changing this setting, you will need to hit "Save", then confirm the change. A reboot of the node is recommended after changing these settings. By default, Commotion prevents access to the administration web
interface from a node's Ethernet port, because sometimes this port will
be connected directly to the Internet. Preventing access to the admin
portal from the Internet helps keep unwanted intruders from damaging the
node and other parts of the network. However, in some advanced network configurations, you'll need to access
the administration web interface over a node's Ethernet port. This may
be the case if the node is configured to mesh over Ethernet, or when the
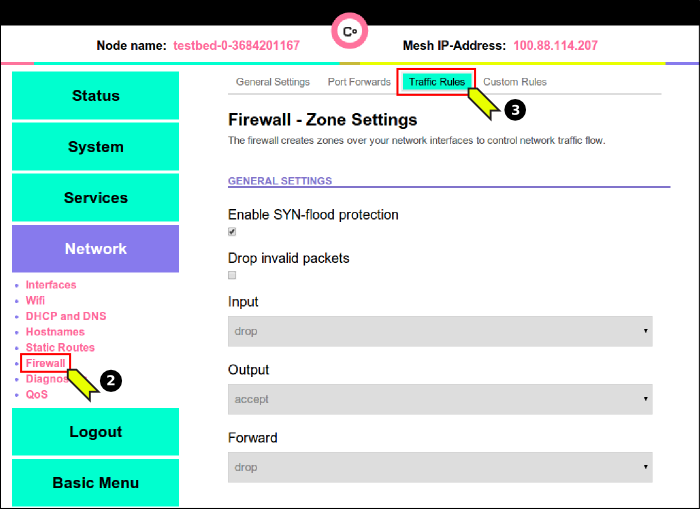
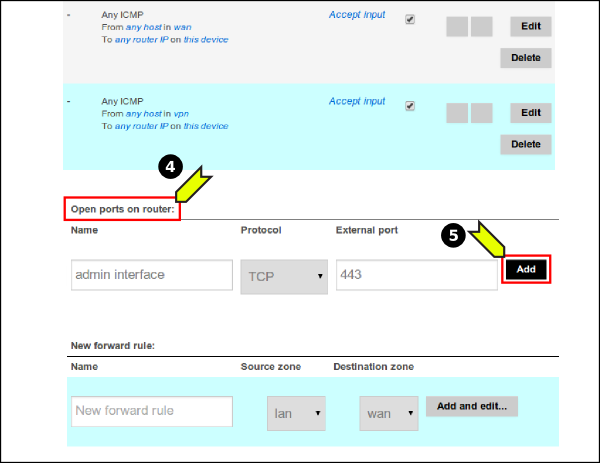
node is attached to a common Ethernet switch with other nodes. If this is the case, you can add a rule to the node's firewall in order
to access the admin portal over the node's Ethernet interface. You'll
begin by connecting to the node's wireless access point, and going to
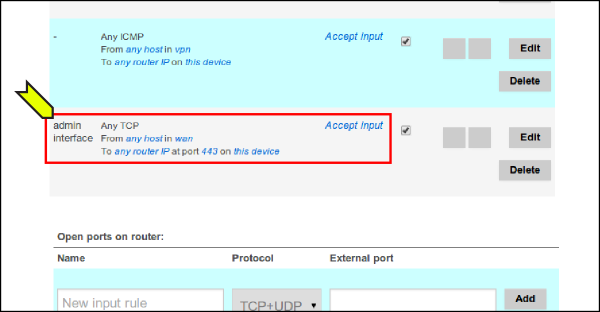
http://thisnode in your browser. After you click "Save and Apply", the changes will be made and you will see the new entry in the Firewall rules:
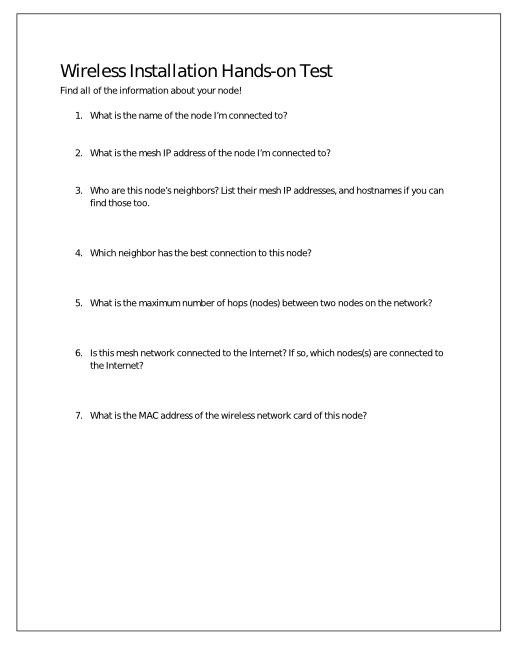
The node with this configuration should now allow access to the Administration panel from any computer or network connected to the WAN (Ethernet) port. When you are done configuring, disconnect the Ethernet cable from the computer. If you wish to host a Gateway (share Internet with the mesh network), plug the Commotion node into your Gateway router or modem, and reboot the node. For further information on various types of hardware setups, please see Common Hardware Setups. For more complicated hardware configurations, see Advanced Hardware Setups. If you are having issues with your Commotion node or configuration, see Troubleshoot your Wireless Node. This is a short hands-on test you can use to explore any Commotion node’s administrator interface. Completing this test is not required to set up a node on a network, but it can help you understand how to find important information that network administrators need to keep the network functioning properly. If you are configuring several nodes with other people, everyone can explore these details if they run through this test on their node, and fill out the answers. As you check and change these settings, be sure to securely record the information. You can use this worksheet if it is helpful.Access Administration interface
Understanding why you got this warning, you can now accept the self-signed certificate to continue.
Configure Common Options
Changing the Administrator Password

Changing the Hostname
Changing mesh configurations
Changing the Access Point Information
Changing the Welcome Page Information
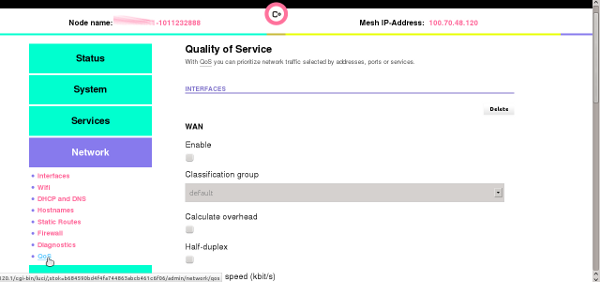
Setting Bandwidth Limits and Quality of Service settings
How to get your node’s mesh IP address
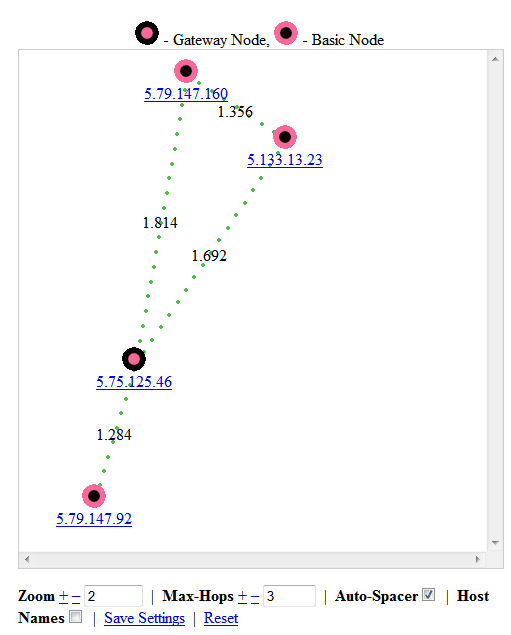
See connections on the mesh network
Setting up a Gateway node
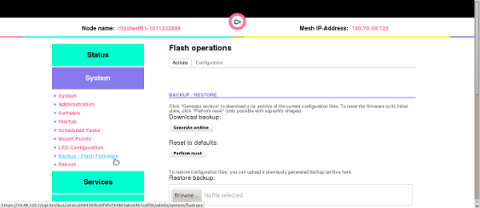
Upgrading to new Commotion software
Advanced Commotion mesh settings
WAN Interface Settings
Opening the firewall for remote Administration
Finishing up
Check your understanding
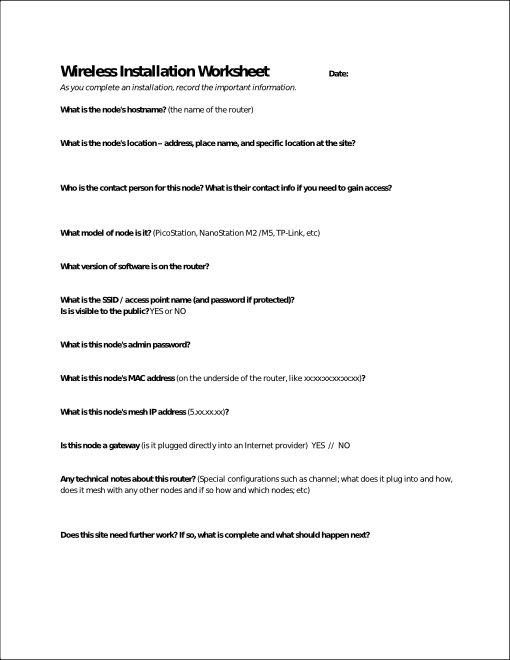
Record important information
Definitions